Jenkins
Basic Configuration
In order to create Jobs on Jenkins, user needs to sign up on Jenkins. Also, for Jenkins to communicate with the JMeter server present in DevOps setup, JMeter server private key needs to be uploaded to the Jenkins server.
To do the above configurations, follow the below steps:
- 1.Sign up on Jenkins.
- Launch Jenkins Master from setup on http://devopshq.shephertz.com.
- Sign up with Jenkins and fill all the required fields.
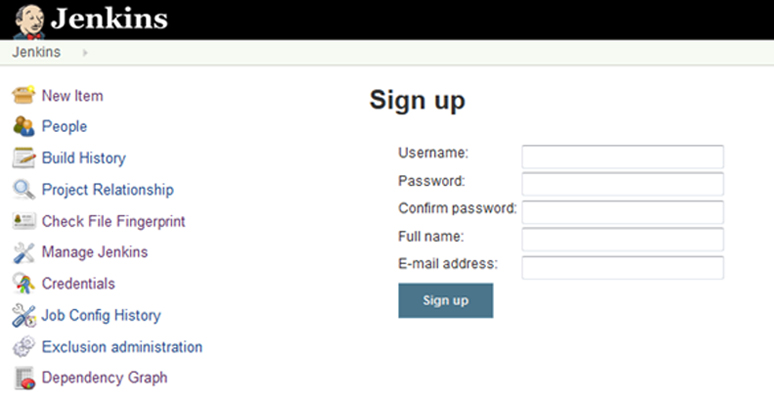 Sign Up Jenkins
 - Login to Jenkins using the username and password with which you have signed up.
- 2.Upload JMeter server private key to Jenkins.
- Go to Jenkins -> Manage Jenkins.
- Click on Managed files .
 Manage files
 - Click on Add a new Config .
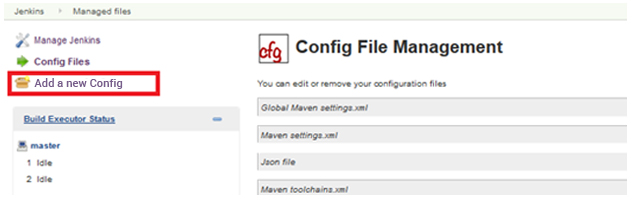 Add new config
 - Select the Type as Custom file and click on submit.
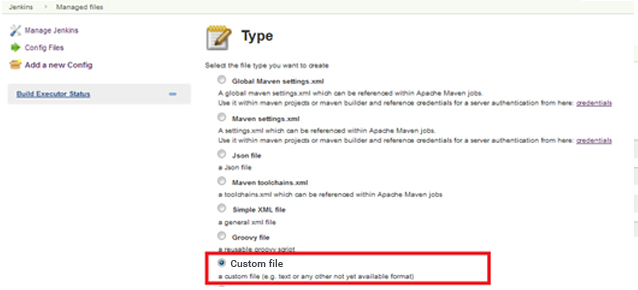 Submit the configurations
 - Enter Name for JMeter private key file, provide the JMeter private key in Content and click on Submit.
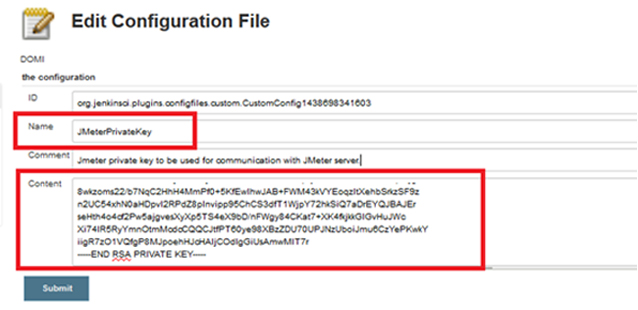 Submit the Jmeter configurations
 - Click on Apply and Save.
Jenkins Master/Slave
App42 DevOps uses Jenkins as Continuous Integration tool. User can create Jenkins Master Slave environment very easily with various modes.
App42 DevOps provides 2 modes for Jenkins Master-Slave setup :
- 1. Only Jenkins Master.
- 2. Jenkins Master with multiple Slaves.
Steps to create Jenkins Master-Slave Environment :
There are 2 ways in which user can use Master Slave mode in App42 DevOps .While creating DevOps Setup, select Jenkins as CI and perform any action as below :
- 1.
Only Jenkins Master
In this scenario, if user has his own Jenkins Slaves which he wants to integrate with DevOps Jenkins Master then user needs to integrate the Slaves manually to the Master node.
Steps to configure Jenkins Master with the Slave node:- a.On the Master machine, navigate to Manage Jenkins > Manage Nodes .
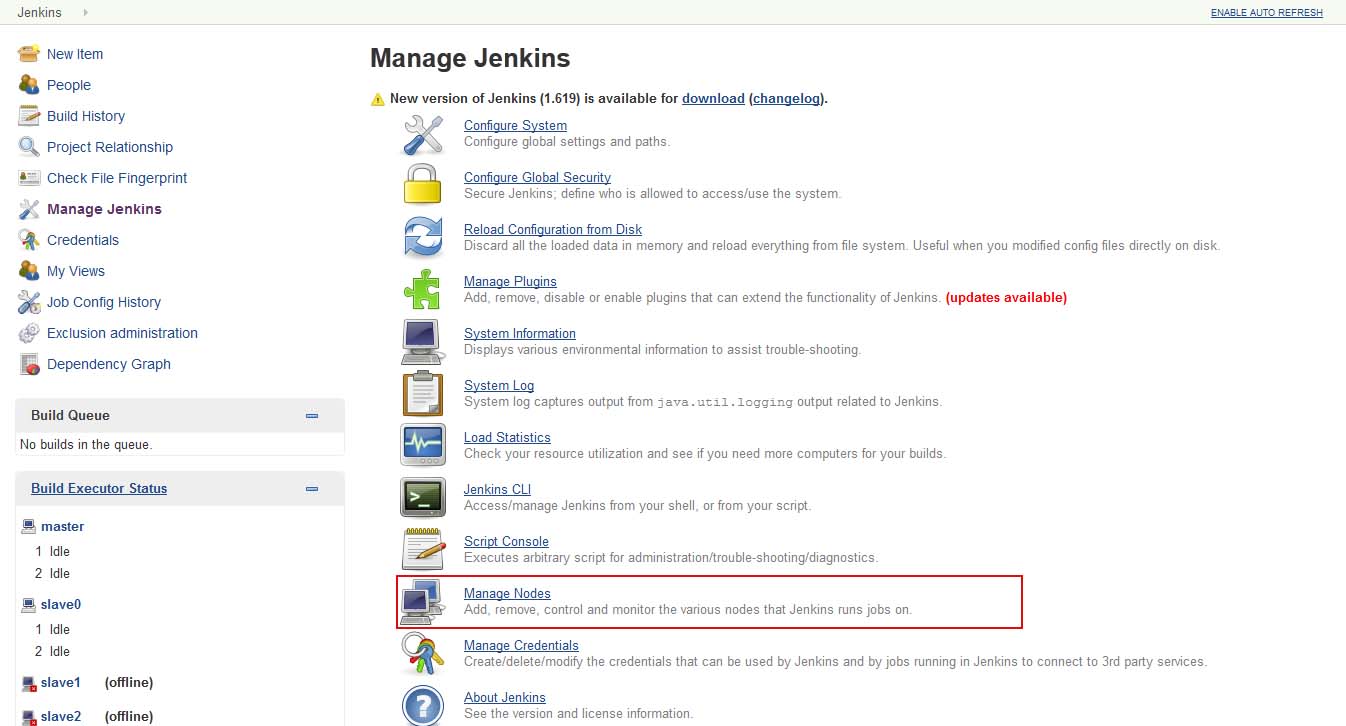 Navigate to Manage Nodes
 - b.Click on New Node .
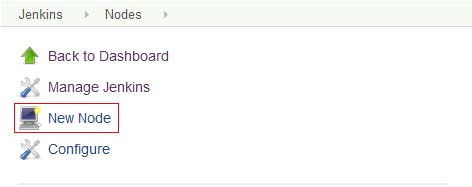
New Node - a.On the Master machine, navigate to Manage Jenkins > Manage Nodes .
- c.Enter the Node name and select as Dumb Slave and click OK .
 Create New Node
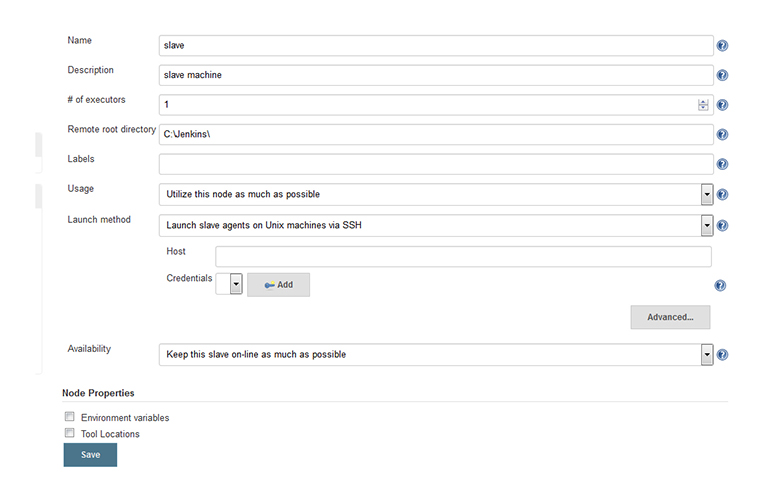
 - d.Fill the following details:
- i.Enter slave machine as description in the Description field.
- ii.Set number of executors as needed.
- iii.Set a Remote FS Root, a home directory for the master on the slave machine.
- iv.Select Launch Method.
- v.In Availability, select any option based on requirement .
- vi.Click Save.
- e.Click on Save .
- f.User can see a command as below:
- g.Run above command on the slave to attach the Slave to the Master. Make sure to replace the JenkinsMasterIpAddress with Jenkins Master IP address.
java -jar slave.jar -jnlpUrl http://JenkinsMasterIpAddress/computer/slave0/slave-agent.jnlp -secret 34298eb683b2a4e050a42d155087110d118af951e23e9b21508d05b653e67691
Finally to select the Slave node on which user wants to run the build for a particular job -
- Go to Jenkins > Job (for which you want to select the Slave).
- Go to “Restrict where this project can be run” .
- Choose the Slave.
 Choose slave
In this Scenario, the Master Slave configuration is done automatically by App42 DevOps and user does not require to do any manual effort for the Master Slave communication.

User can see on Jenkins Slave page that Jenkins Slaves are automatically “Connected via JNLP agent”.


