App42 DevOps Guide
This guide explains how App42 DevOps solution with automatic wiring of the DevOps toolchain can be used for Continuous Delivery & Deployment purpose. The example taken in this guide is of a 3 tier application (application/database/webserver).The assumption taken in this guide is, Devops setup along with application nodes are in ShepHertz VDC. The Guide explain how a user can use the App42 DevOps setup and configure various jobs to build / deploy and test his application automatically , which will lead to automatic deployment by just a push of his code into source code management repository.
To Experience the complete App42 DevOps Solution, user needs to follow the below steps:
- 1.Fulfill the prerequisites that is to create a DevOps setup and application nodes.
- 2.Job configurations on Jenkins for build, deploy and test.
- 3.Job triggering which will run the jobs on jenkins and user can observe the different phases of devops
Build -> Unit Test -> Deploy-> Functional Test- > Load test - 4.Code change in the sample application project which will lead to automatic deployment.
Pre-requisites
- 1.Create a new setup from DevOps > Manage Environment. Click on Create Environment with following resources:
- Jenkins
- Chef /Puppet
- Artifactory
- Selenium
- JMeter
- 2.Once the setup has been completed, message will appear to create Application Nodes as follows:

Click Yes if you want to create Application Nodes. This will navigate you to Create Application Nodes pane.
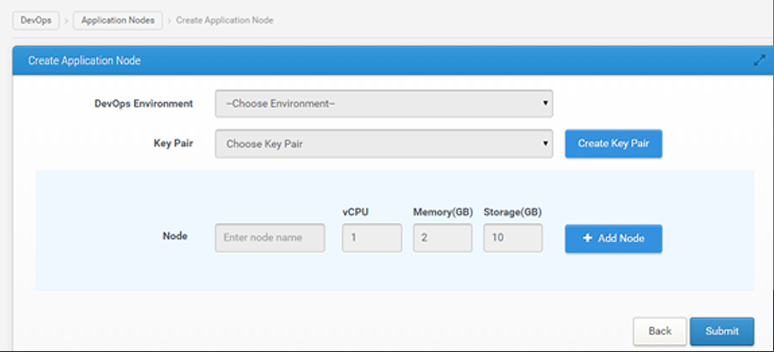 Create Application Nodes
- Choose Environment with which nodes are required to be associated.
- Choose key from Key Pair dropdown for the nodes or create a new key.
- Enter the name of node. Also, if you want to create more than 1 node, click on Add node.
- Click on Submit.
Application Nodes have been created successfully.
You can also create application nodes from DevOps > Application Nodes.
Configurations Required
- 1.
Upload Private Key of JMeter to Jenkins Server
Upload the private key of JMeter server in Jenkins using the Upload file from Jenkins from DevOps dashboard. Upload private key
 - 2.
Configure Chef Workstation
Download Chef Starter Kit
Get the Chef Server IP from DevOps Management console and launch chef from your browser and follow the below steps:- Sign up on Chef and fill all the mandatory fields.
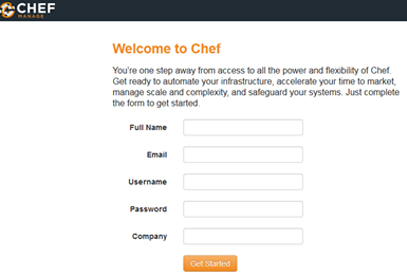 Sign up Chef
 - Click on “Create New Organization” to create an organization.
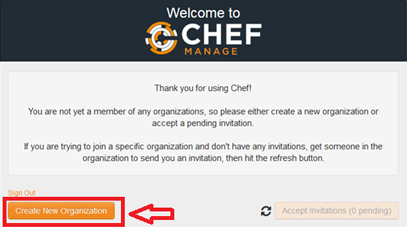 Create new organization
 - Provide Organization “Full Name” and “Short Name”.
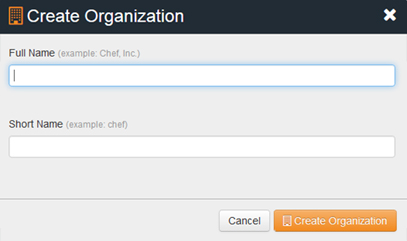 Fill Organization details
 - Click on “Create Organization”.
- Once the organization has been created, click on “Download Starter Kit”.
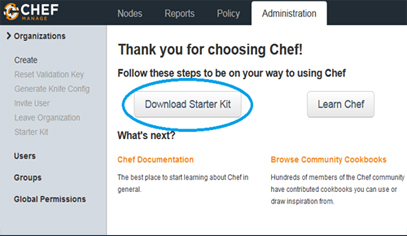 Download Starter Kit
- Sign up on Chef and fill all the mandatory fields.


